Stereo Camera Calibration Tool
Calibrates two Camera based on two checkerboard frame sequences and entered settings, exports them to disk or to a Node-Graph Editor
Quick Start
To open a tool go to 4D Tools >> Stereo Camera Calibration Tool.
Calibration has the next steps:
Select frames with checkerboard for calibration at Stereo Camera Calibration: Input Data Tab
Select checkerboard parameters at Stereo Camera Calibration: Cheсker Board Tab
View Calibration Results at Stereo Camera Calibration: Calibration Results Tab
Note
To quickly move between tabs, you can use the Mode menu.
Stereo Camera Calibration: Input Data Tab
Frames for calibration are selected on this tab.
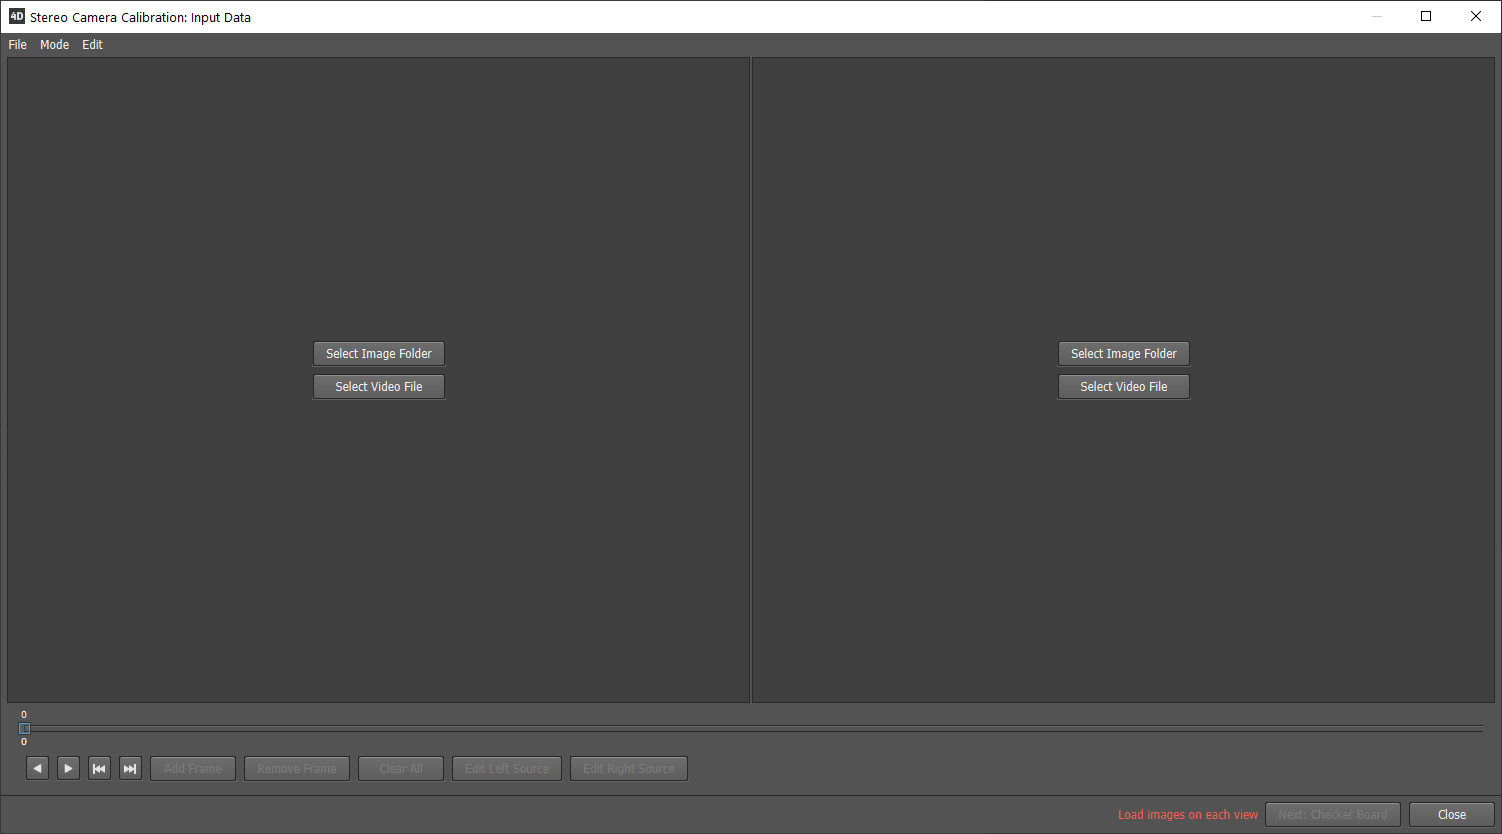
The interface is divided into 3 parts:
- Two Viewports:
Display frames of loaded sequences or video files
- Frameline:
Allows you to move between frames
- Buttons:
To interact with frame sequences
Edit Menu
Select Left Image Folder |
. |
Select folder to load images on the left viewport |
|
Select Left Video File |
. |
Select video to load on the left viewport |
|
Select Right Image Folder |
. |
Select folder to load images on the right viewport |
|
Select Right Video File |
. |
Select video to load on the right viewport |
|

|
Prev Frame |
Left |
Displays the previous image |

|
Next Frame |
Right |
Displays the next image |

|
Prev Selected Frame |
CTRL + Left |
Displays the previous selected image |

|
Next Selected Frame |
CTRL + Right |
Displays the next selected image |
Add Frame |
Space |
Adds the current frame to calibration |
|
Remove Frame |
Del |
Removes the current frame from calibration |
|
Clear All |
. |
Removes all frames from the calibration |
|
Edit Left Source |
. |
Left viewport frame rotation and offset settings |
|
Edit Right Source |
. |
Right viewport frame rotation and offset settings |
How To Use
First of all load checkerboard image sequence or video file on each viewport. Use Select Left Image Folder or Select Right Image Folder buttons to load image sequence, Select Left Video File or Select Right Video File buttons to load video files, or Drag and drop folders or video files to the viewport. After that, use Frameline and Buttons to navigate and select images in frame sequences.
To set the frame rotation and offset of the whole sequence (when the video is out of sync), use the Edit Left Source or Edit Right Source.
Note
Supported video formats: .mov, .mp4, .avi, .mkv.
Supported image extensions: .jpg, .jpeg, .png, .exr, .tif, .tiff.
All images in a sequence must be the same size.
After choosing frames click on Next: Checker Board

If the frame sequence does not meet the conditions, the button for moving to the next tab will be inactive, and the error message will be displayed next to it.
Tip
A few tips for getting a good camera calibration:
Try to capture the most diverse positions of the checkerboard, this will greatly increase the accuracy of the camera output parameters.
Try to choose as many different positions of the checkerboard as possible, this increases the accuracy of the calibration.
Do not select frames where the checkerboard is not fully displayed or has highlights, it can’t be detected.
Calibration requires at least 1 frame, but for a good result, it is recommended to add 20-30 frames.
Stereo Camera Calibration: Cheсker Board Tab
On this tab, you need to set the checkerboard parameters.
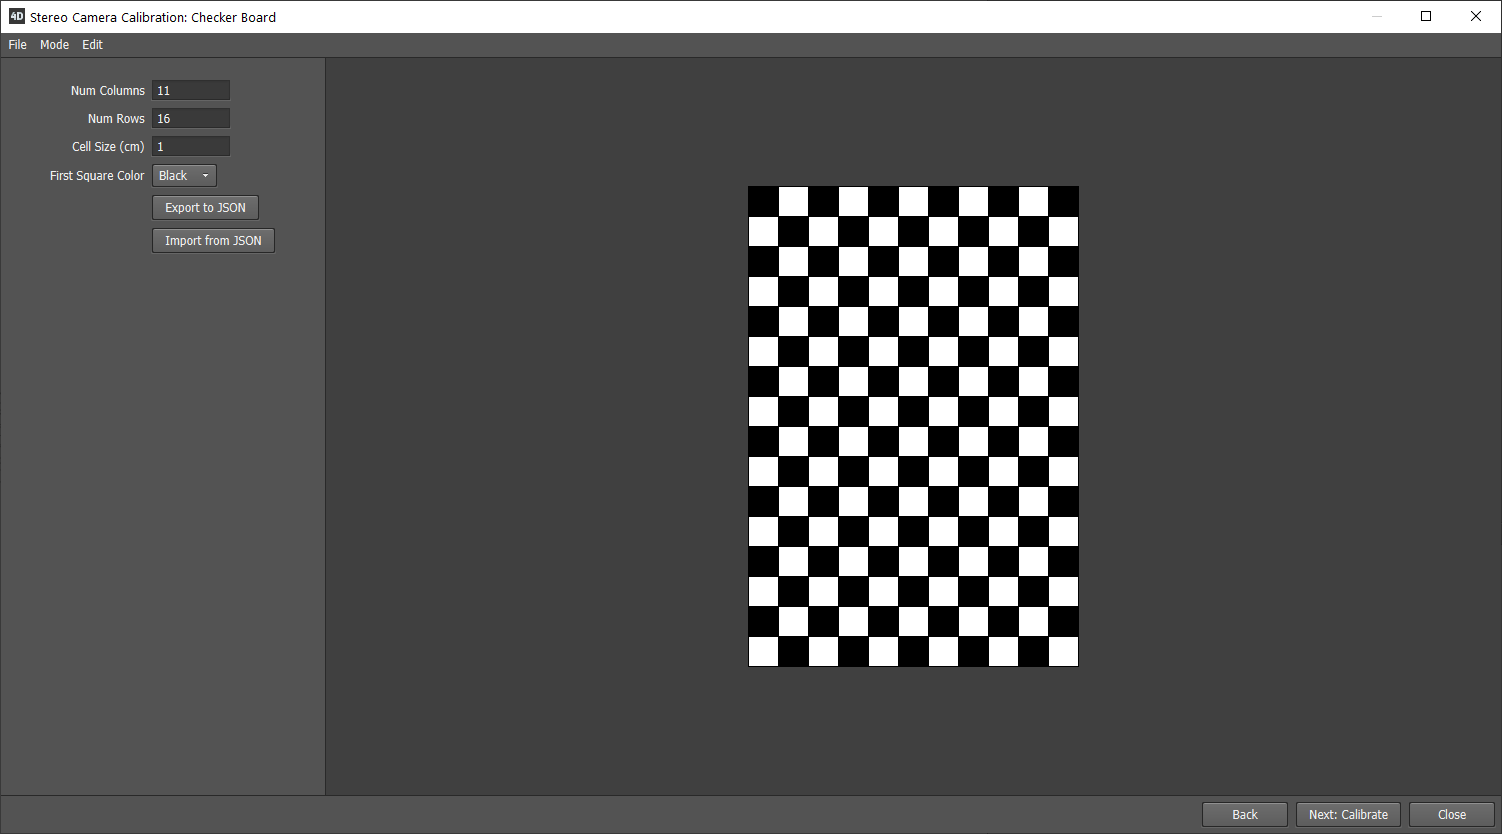
Parameters
- Num Columns:
number of columns of checkerboard cells
- Num Rows:
number of rows of checkerboard cells
- Cell Size (cm):
checkerboard square size in centimeters
- First Square Color:
the color of the first square of the checkerboard
Edit Menu
Import From JSON |
Import parameters from JSON file |
Export to JSON |
Import parameters to JSON file |
Next: Calibrate |
Calibrates cameras using input data |
Next: To Results |
If calibrated, moves to the Calibration Results tab |
How To Use
In the parameters, specify the number of cells in the columns and rows, and the size of the cell in centimeters. You can also Import and Export parameters to json file. The viewport displays a preview of the checkerboard.
Attention
Make sure that you correctly specify the Num Columns, the Num Rows and the Cell Size (cm) of the checkerboard pattern.
After setting the parameters, click Next: Calibrate to start the calibration.
Calibration
During the calibration process, a window appears which displays the current state of the calibration. You can interrupt the process by pressing the Terminate button or the Esc key.
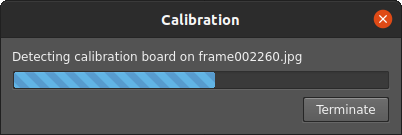
When the calibration is completed, the next tab will automatically appear.
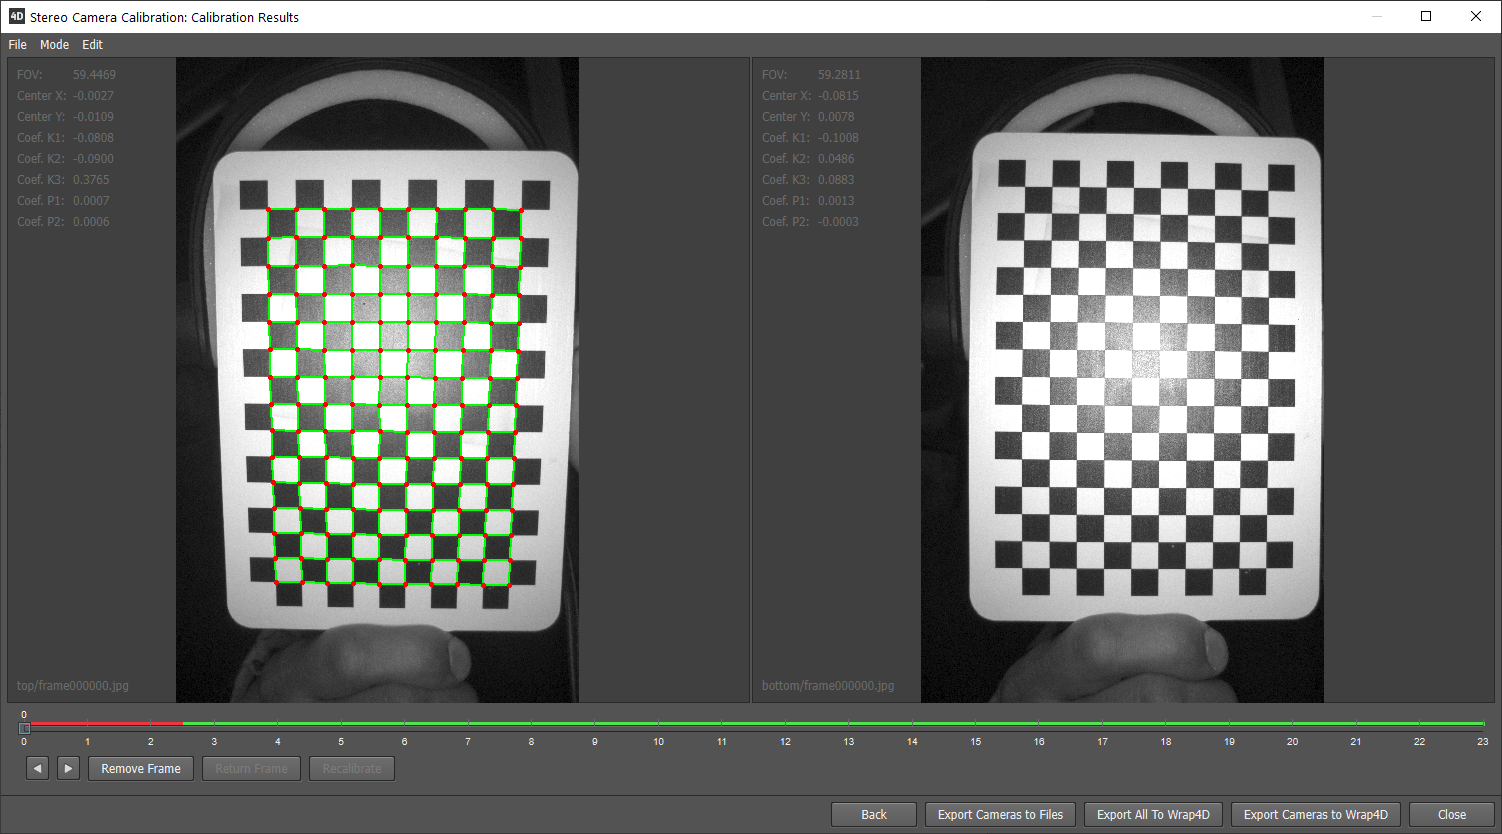
Stereo Camera Calibration: Calibration Results Tab
This tab displays the calibration results. Also on this tab, you can remove frames that spoil the calibration.
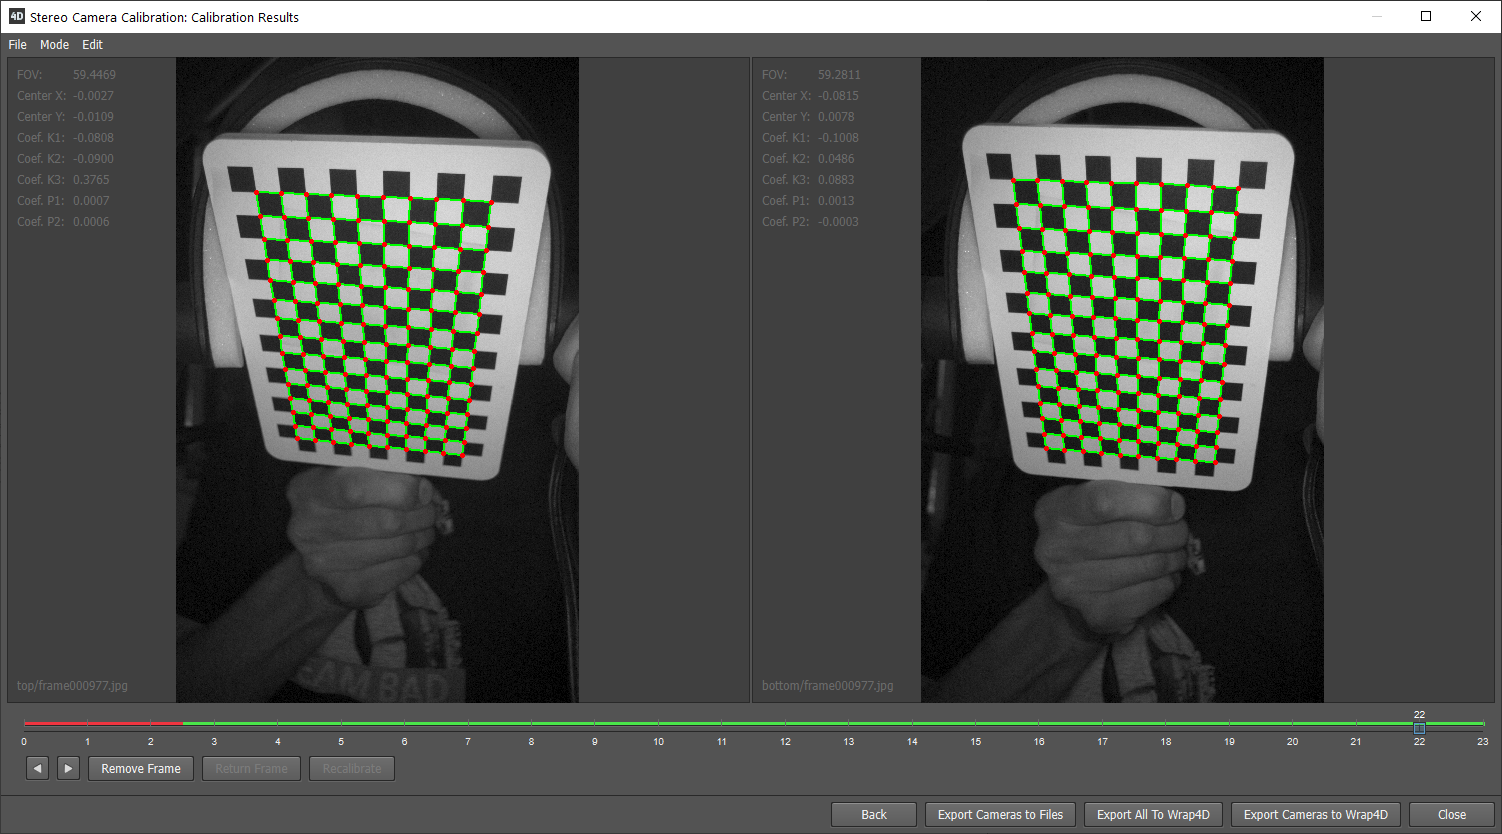
The interface is divided into 3 parts:
- Two Viewports with camera data:
Display frames of calibrated sequences and calibrated camera data
- Frameline:
Allows you to move between calibrated frames
- Buttons:
To interact with image sequences or export data
Edit Menu
|
|
Prev Frame |
Left |
Displays the previous image in the sequence |
|
|
Next Frame |
Right |
Displays the next image in the sequence |
Remove Frame |
Del |
Removes the current frame from calibration sequence |
|
Return Frame |
. |
Return the current frame to calibration sequence |
|
Return All Frames |
. |
Returns all frames to the calibration sequence |
|
Recalibrate |
. |
Starts a calibration without removing frames |
|
Export Cameras to Files |
. |
Exports cameras to JSON files |
|
Export Cameras to Wrap4D |
. |
Exports cameras to node-graph |
|
Export All to Wrap4D |
. |
Exports all calibrated data to node-graph |
How To Use
After calibration, the frames where the checkerboard was found will be shown with the grid of the detected checkerboard. Frames where a checkerboard was found on two frames in sequences are displayed in green on the frameline. If the checkerboard was not found on at least one of the frames, it will be marked in red.
Note
The displayed board is two columns and two rows smaller than the specified board.
Due to various factors, the checkerboard can be detected incorrectly, сheck the entire calibrated sequence at how the checkerboard was detected on each of the frames. Frames where the checkerboard was detected incorrectly can be removed from the sequence, and the entire sequence recalibrated.
Note
The camera with index 0 (which is calibrated from the images on the left viewport) will always be positioned at the world origin and look straight ahead.
After that, you can Export the results either to disk or to Wrap4D graph.
Export Results
Calibrated cameras can be exported in three ways: Export Cameras to Files, Export Cameras To Wrap4D Graph and Export All to Wrap4D
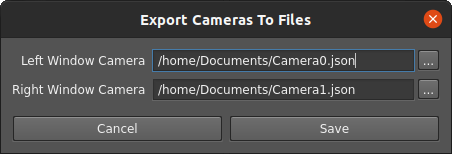
Export Cameras to Files
Exports cameras to disk for the specified paths.
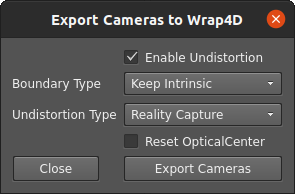
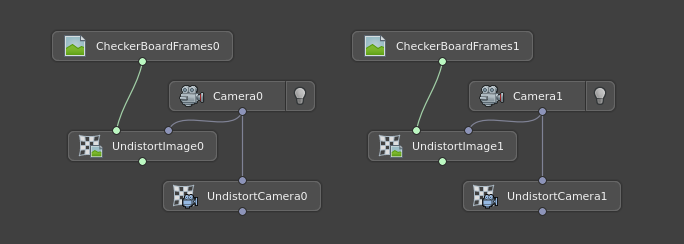
Export Cameras To Wrap4D Graph
Exports cameras to the Node-Graph Editor along with the UndistortImage and UndistortCamera nodes.
Use this option if you need to use calibrated cameras in a Wrap or Wrap4D. To export, you need to specify the following parameters in the pop-up window.
- Enable Undistortion:
If set, then undistort nodes will be created along with the cameras.
- Boundary Type:
The Boundary Type parameter that will be set in the undistort nodes
- Undistortion Type:
The Undistortion Type parameter that will be set in the undistort nodes
- Reset Optical Center:
The Reset Optical Center parameter that will be set in the undistort nodes
After accepting the parameters, nodes appear in the Node-Graph Editor immediately.
Export All to Wrap4D
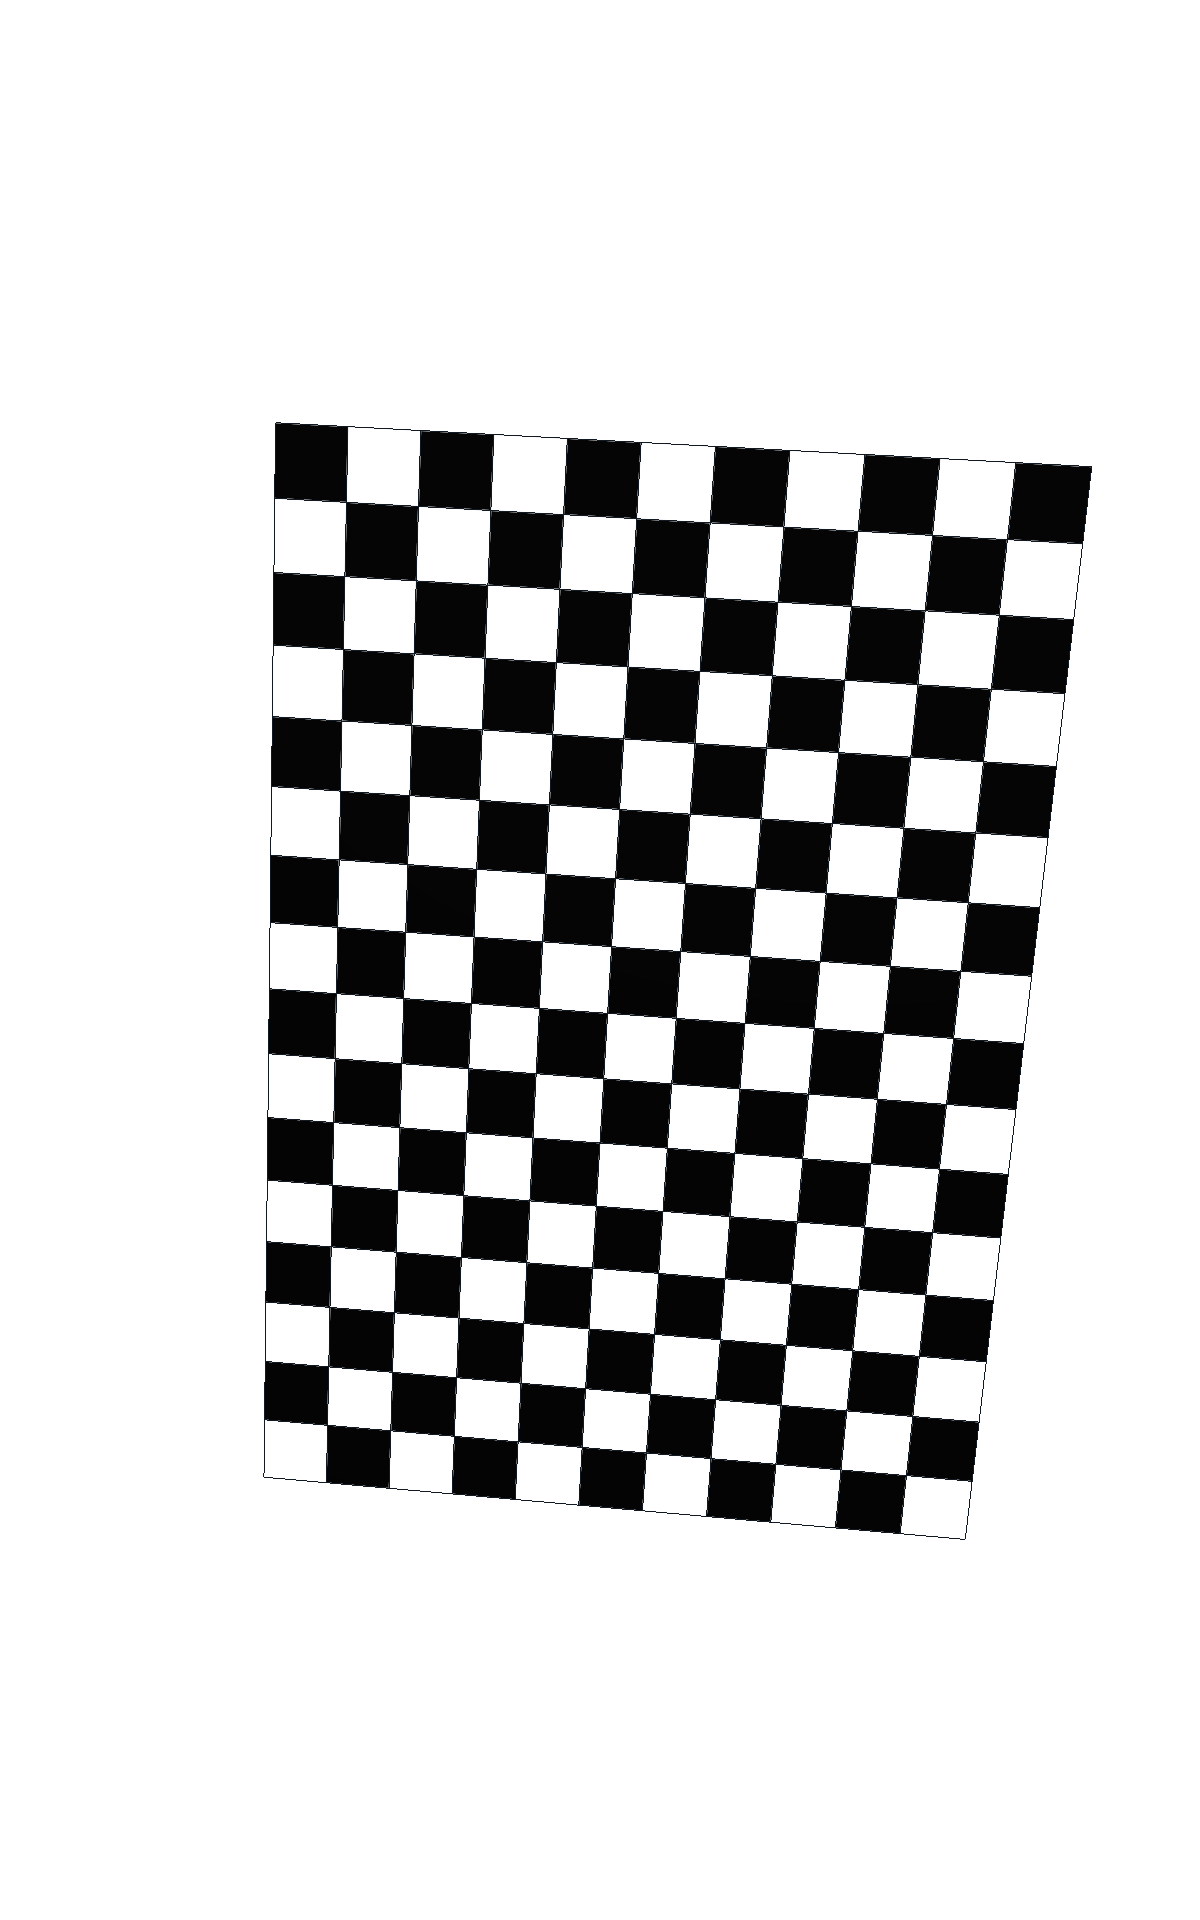
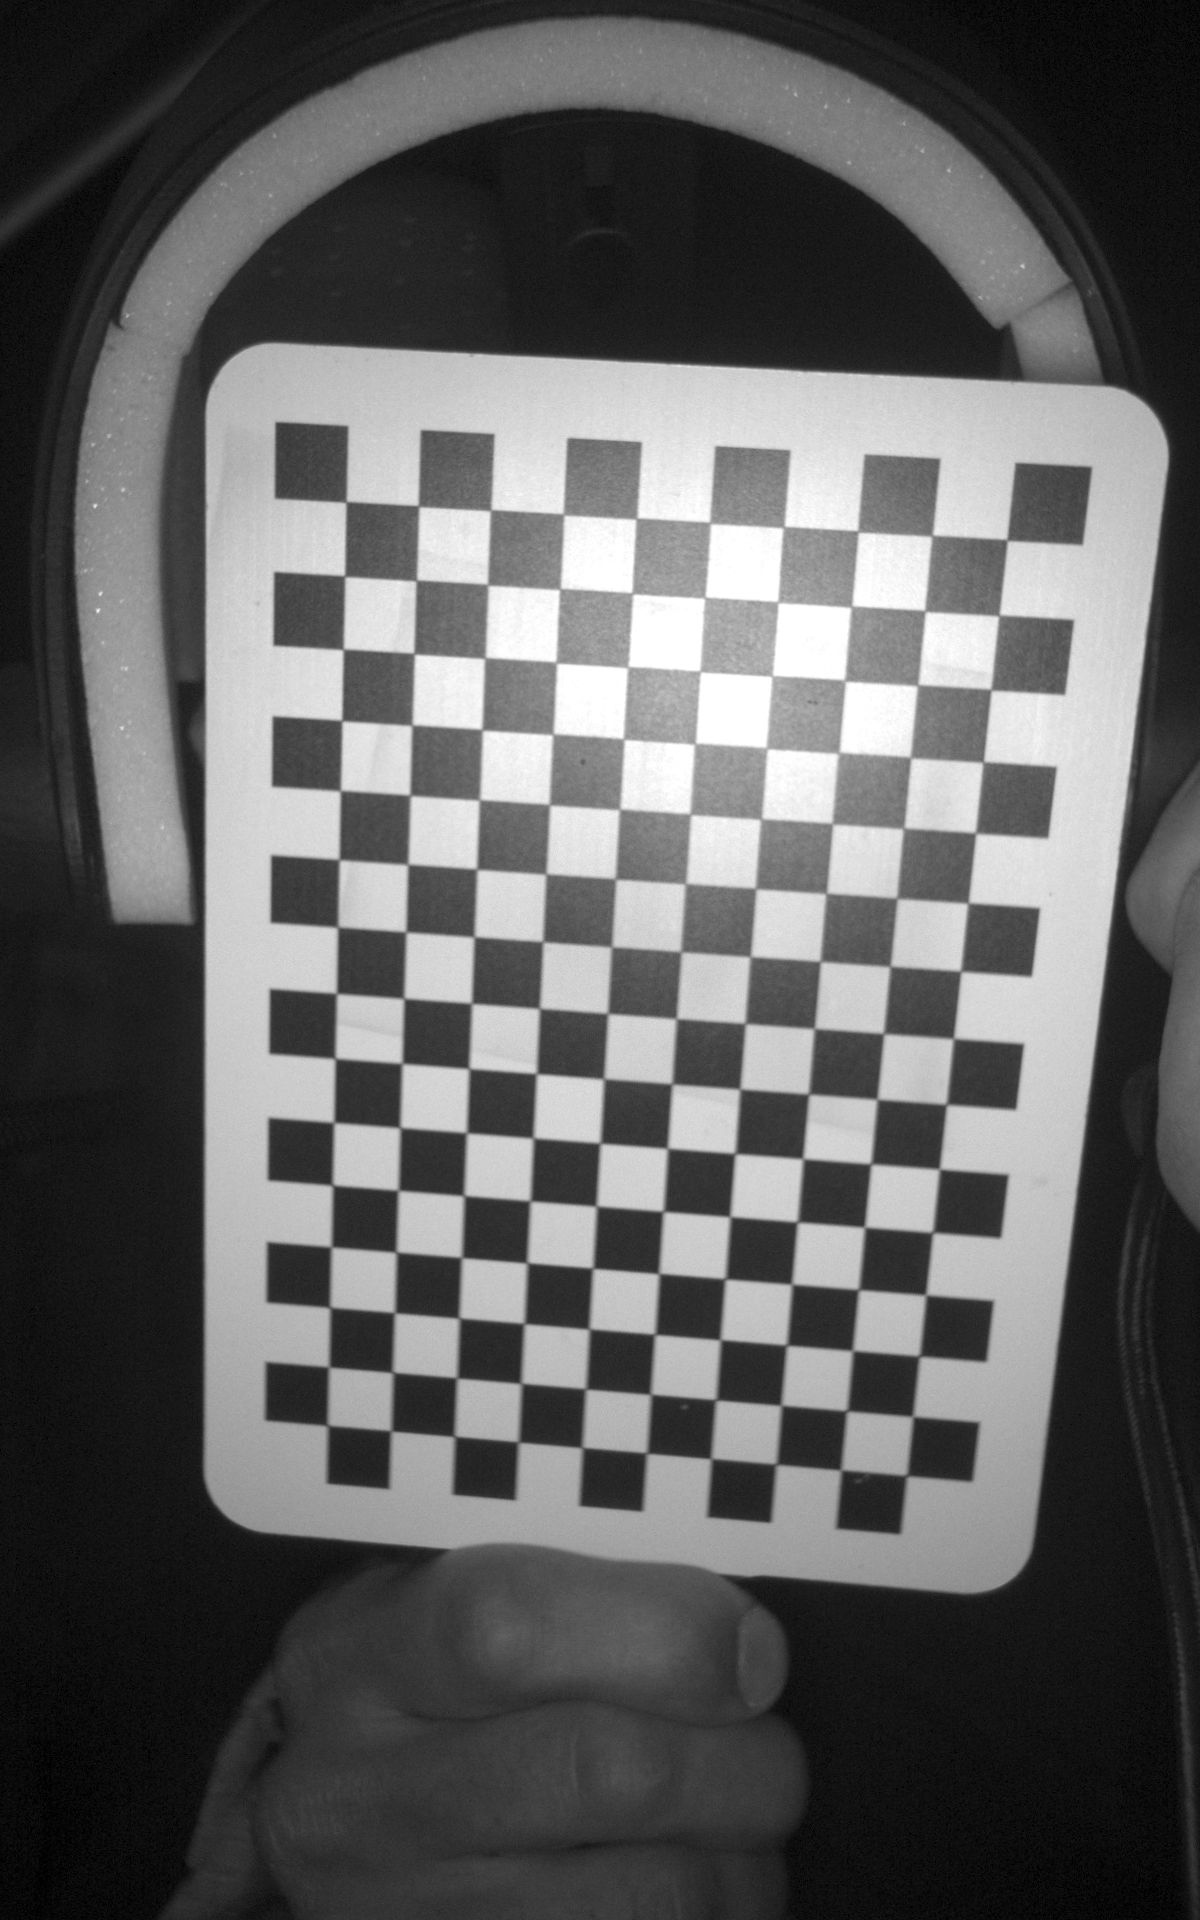
Exports to Node-Graph Editor, cameras, checkerboard geometry with texture and checkerboard transforms. Matches the rendered checkerboard geometry with an undistorted checkerboard images.
Use this option if you want to check the calibration accuracy.
To export you need to select the export folder and specify the paths to: cameras, checkerboard geometry, texture, checkerboard transforms folder, and specify the parameters for undistort nodes.
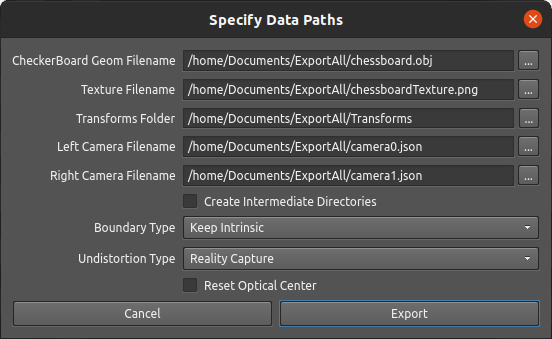
- Create Intermediate Directories:
if set, nonexistent directories in the file path will be created
- Boundary Type:
The Boundary Type parameter that will be set in the undistort nodes
- Undistortion Type:
The Undistortion Type parameter that will be set in the undistort nodes
- Reset Optical Center:
The Reset Optical Center parameter that will be set in the undistort nodes
After accepting the parameters, nodes appear in the Node-Graph Editor immediately.
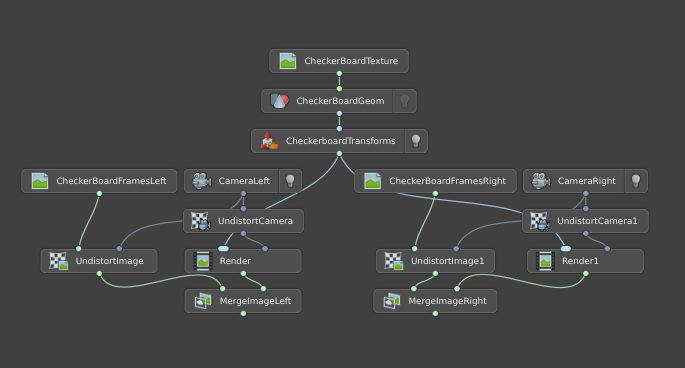
Using MergeImage, you can see how the rendered checkerboard matches the checkerboard on the undistorted image.
Render |
UndistortImage |
MergeImage |
|
|
|
Setup Saving and Loading
You can save the calibration setup and open it at any time.
New Setup |
CTRL + N |
Clears all data from the current setup |
Load Setup |
CTRL + O |
Loading a setup from a file |
Save Setup |
CTRL + S |
Saving the setup to the previously specified path |
Save Setup As |
CTRL + Shift + S |
Saving the setup to the specified path |
Note
If the sequence folder paths don’t exist, you can re-import them. In the pop-up window with the question “Clear input and calibrated data?”, you must click “No”. In this case, the sequence will be loaded and the calibration data will not be lost.