Track Mode
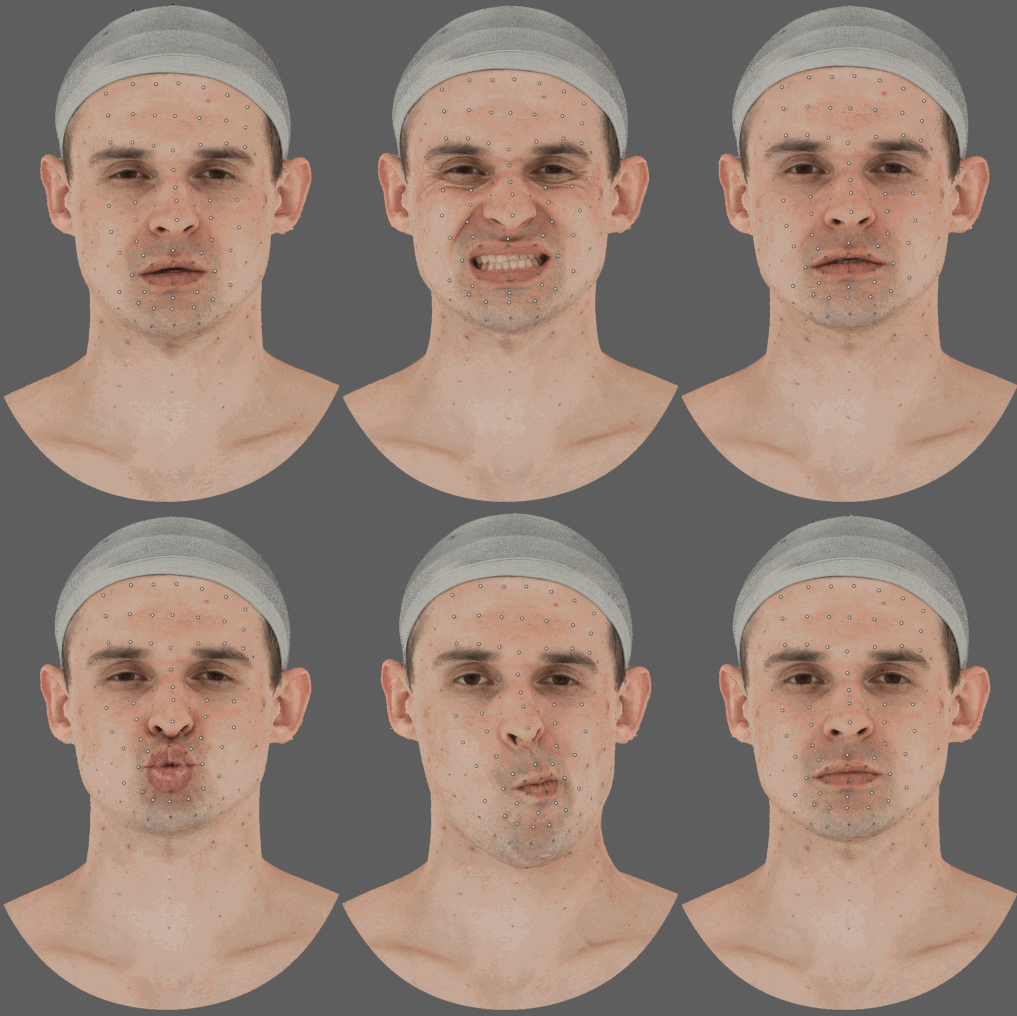
In the Track mode, you can get a sequence of JSON files with landmarks tracking. Landmarks are special features on the face, for example, marked dots on an actor’s face. To do this:
Place the markers on one of its frames.
Creating Markers
To create a marker on any landmark, press C key or the Create button and then click on the desired point in the viewport. A marker will appear in that place. Set its center precisely on the landmark by moving it in the viewport or the Pattern Window.
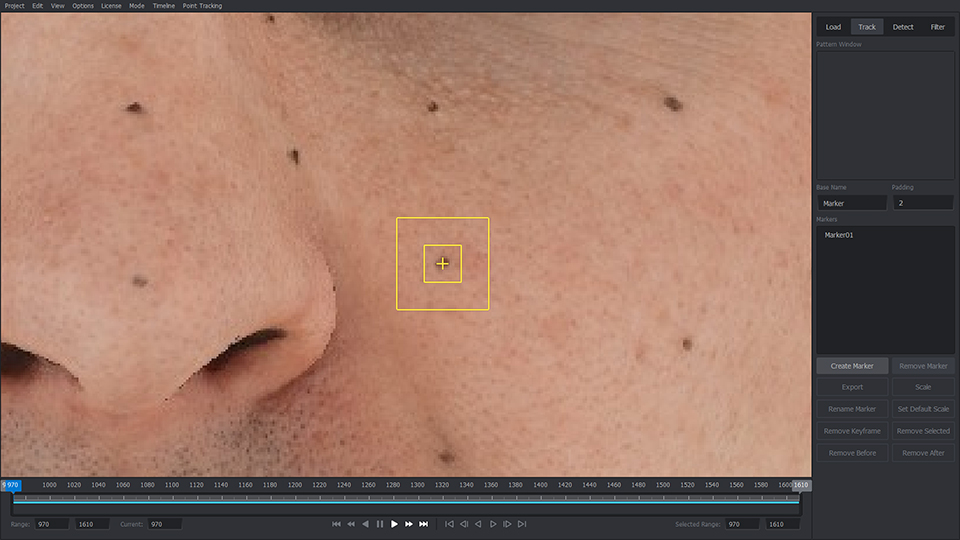
Since the marker data will be used in Wrap4D, the markers need to be given names corresponding to the names on a Basemesh (more). Created markers can be renamed by pressing F2 key or the Rename button. For newly created ones, it is better to use fields BaseName and Padding.
After creating the necessary number of markers, select all them and start to track. If you created a marker, then it immediately becomes selected, and you can start tracking it.
Tracking
To avoid manually setting marker positions on each frame of a large sequence, use tracking algorithm. It is trying to track marker landmark from frame to frame.
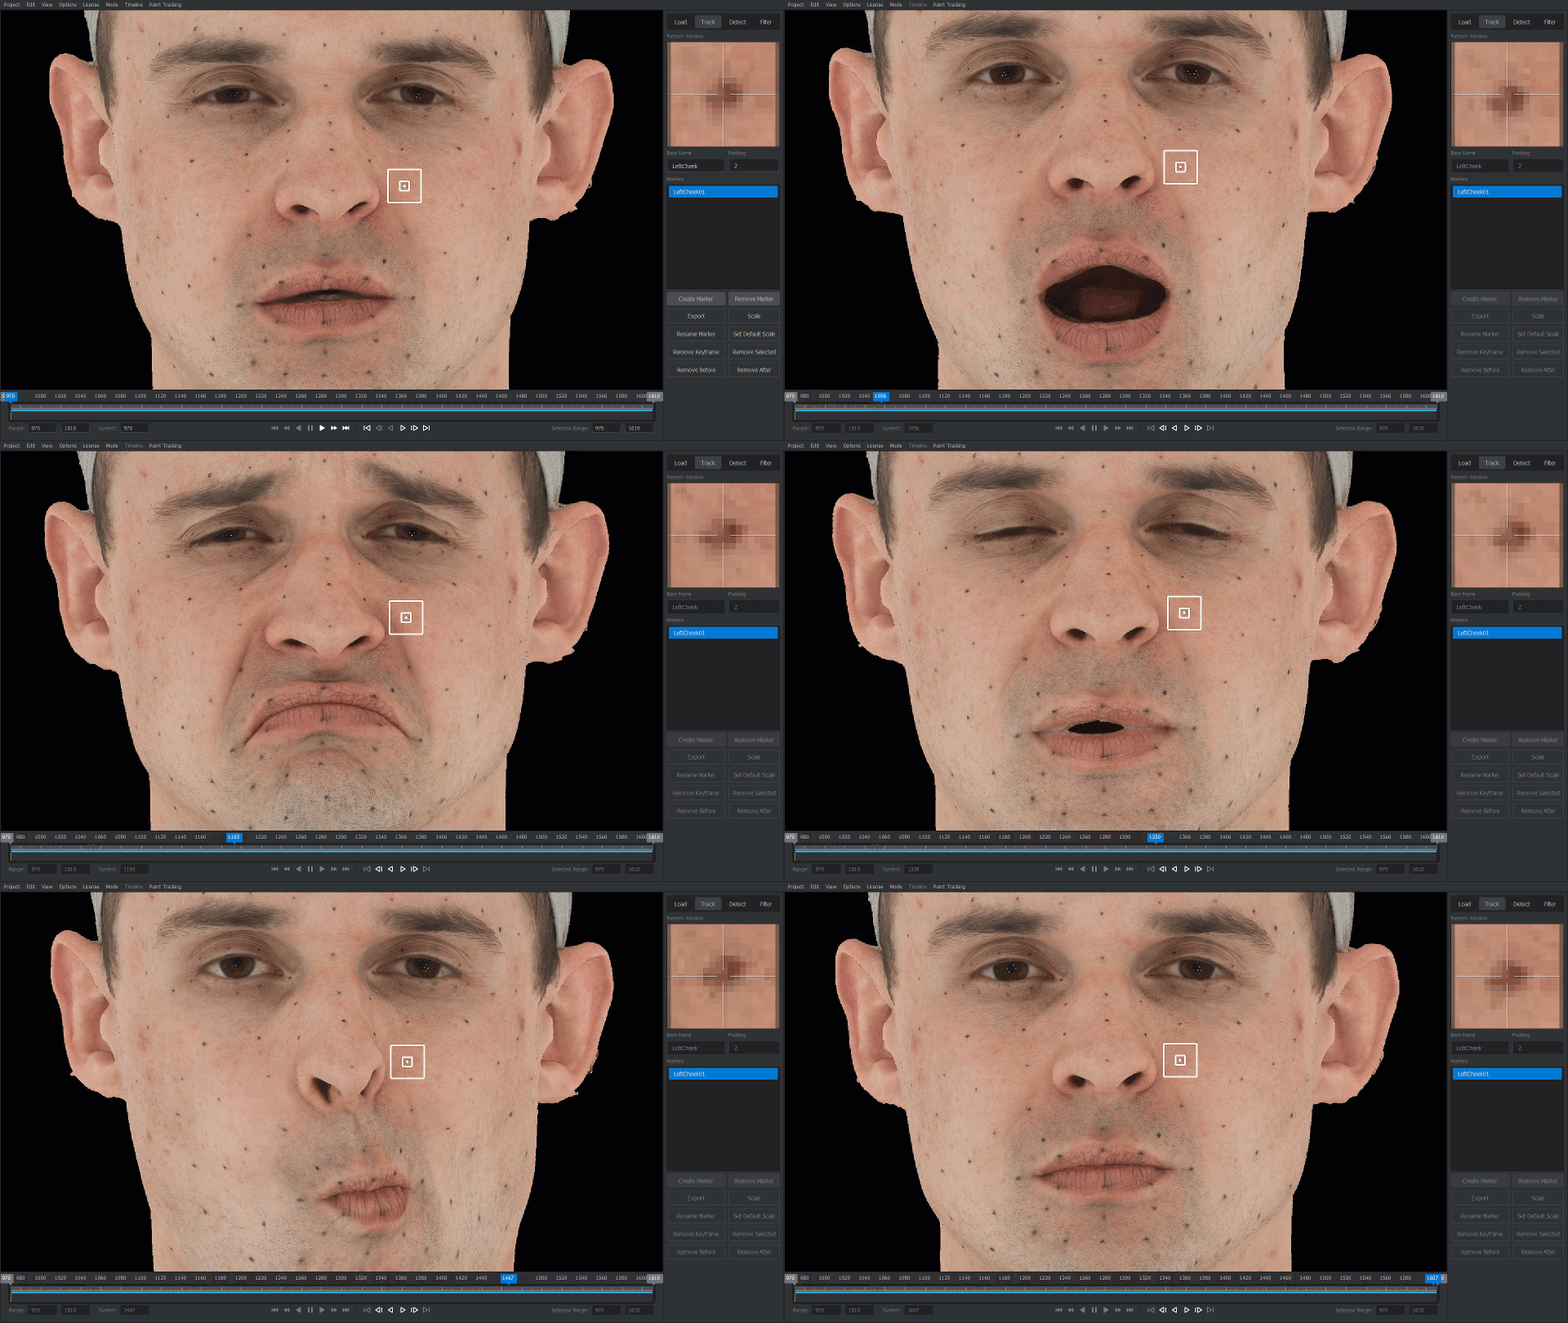
Tracking is a sequential launching of the detector on each next frame. To track marker(s), select them and press the ] key to play frames forward, or the [ key to play backward. When the sequence is being played, the marker tracks and as a result follows the landmark with the greatest possible accuracy.
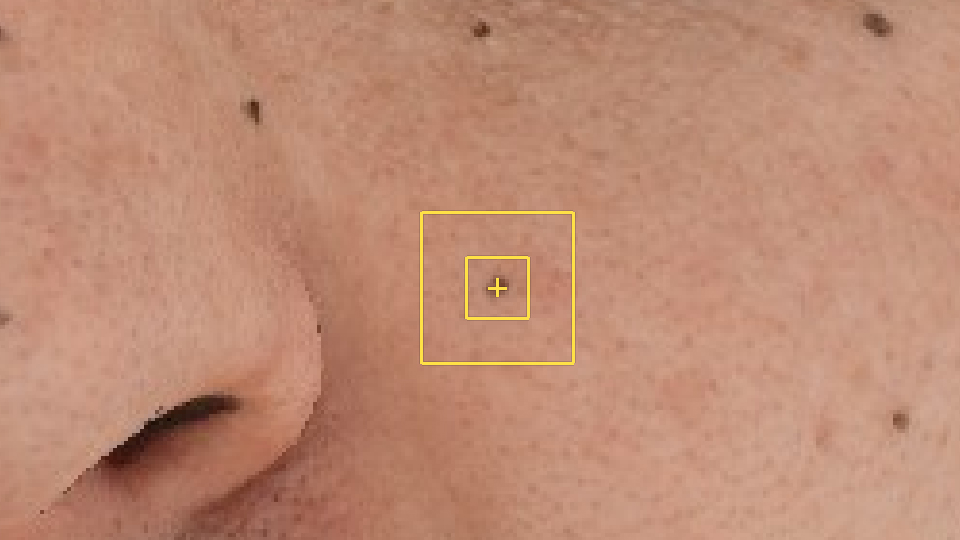
When you create a marker or when you move it manually in a frame, a keyframe is automatically created for it. Such a frame will be marked in yellow on the timeline. Accordingly, in these frames, the marker should be on the landmark most accurately.
|
|
Tracked Marker |
Interpolated Marker |
- The marker can be in two states, each of which has its own color:
Default. The marker has just been created, or this frame is a keyframe or a tracked frame for this marker. It is marked in yellow in the Viewport. The position of the marker on the screen corresponds to its real position in the keyframe or tracked frame.
Interpolated. The marker position is unknown and will not be used for export. Displayed in shaded color. Its position in the Viewport is calculated as a linear interpolation between the nearest left and nearest right tracked frame or keyframe. On a timeline, such kind of frames is still dark gray.
After the marker tracking stops (for one of these reasons), the corresponding played frames will become tracked. On the Timeline, they are indicated in blue (tracked forward) or purple (tracked backward). Now, when you will export markers, in the corresponding files will be the values of the positions of these markers.

Note
The frames that weren’t tracked and non-keyframes should be left only where you do not need the values of the positions of the landmarks. For example, where they are out of a frame, or obscured, or caught in a fold of the skin.
If you don’t like the way how was a certain part of the sequence tracked, you can track the marker again in this part by changing the marker settings (more details). To do this, go to the appropriate frame and repeat all the above steps. You can also try to track frames one at a time to find out the specific location and cause of the unwanted dislocation of the marker.
If you no longer need some markers, you can remove them. The same you can do with individual marker frames (how to do this here).
Now you can track other frames using the same action algorithm. You can speed up this process if you track a group of markers. To make it easier to navigate the timeline, you can use movement within keyframes.
When you tracked all the necessary landmarks, you can export them.
Marker Tracking Stop
- To stop the tracking manually:
You can stop tracking by pressing the tracking button again or the SPACE button.
- Tracking the marker will stop by itself if:
You have reached the end (beginning) of the timeline and tracking has completed successfully.
Marker reached its keyframe. If you are approaching a frame for which you already once manually determined the position of the marker, tracking will stop.
Marker came off. This happens if the tracking algorithm considers the error of the next frame to be large enough. Reasons: the landmark disappears from the field of view or becomes difficult to distinguish.
- If a marker dislocated:
If the landmark is in the field of view and you need its position on these frames, you can resize the Pattern Window and Search Window (more).
If the landmark disappears in the frame, then go to the next frame, where it is visible again. Set the marker position on the landmark (the yellow keyframe mark should appear on the timeline) and continue tracking.
Export Markers
- To export markers:
Select the markers you want to export (you can select all by pressing CTRL + A).
Select a range on the timeline (the one on which you need the positions of the landmarks). You can read about how to do this here.
Click the Export button.
In the appeared dialog, select the folder where you want to save the JSON file sequence. Each of these files will contain the positions of all the markers that are visible on the frame (Note that interpolated frames are not exported. You can read about them here).
You can use the resulting files in the 4D processing pipeline (more).
Tracking Algorithm
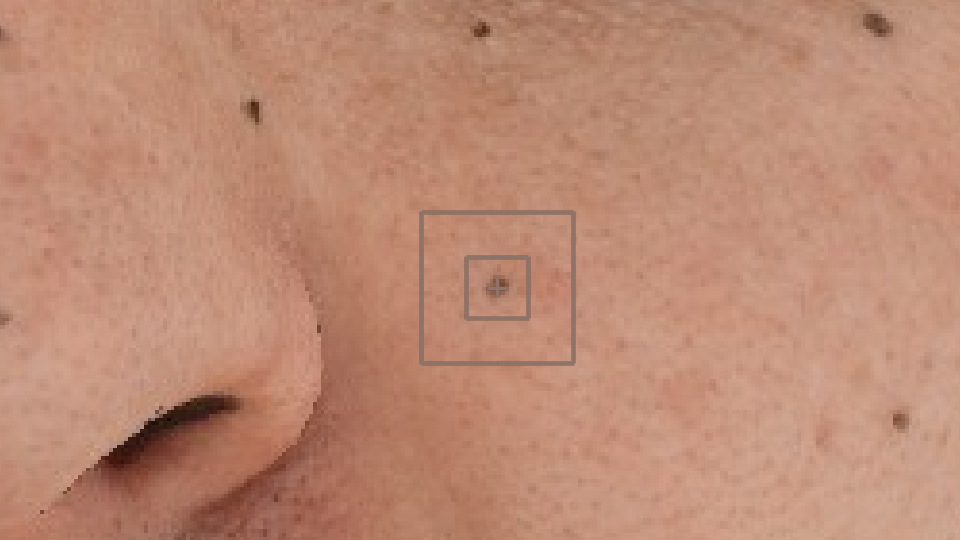
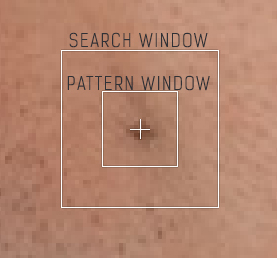
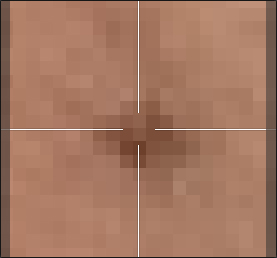
Each marker being created has two special areas: Pattern Window and Search Window. They appear as windows around the center of the marker. Internal is the Pattern Window that frames the borders of the landmark where the marker is placed. External is the Search Window which is used by the algorithm that is trying to find in each next frame within this window a set of pixels that is most similar to the batch specified in Pattern Window.
These windows are displayed in the viewport around the marker.
|
|
Viewport |
Pattern Window |
Note
Pattern Window is always contained in the Search Window. However, they do not have to be centered on the marker.
You can change the size of these windows to improve marker stability.
Note
When moving from frame to frame, the detector accumulates information about areas from the Pattern Window, thereby improving the detector’s operation. This means that the longer you track the marker without stopping, the more stable its position is determined. After interrupting or stopping tracking, this accumulated information is reset.
- Basic rules for resizing windows to improve tracking stability:
If the landmark moves outside the Search Window area due to the too sharp movement of the actor, increase this window.
If the marker moves to another landmark, this is an occasion to reduce the Search Window. It is possible that several sections resembling the pattern appear in the Search Window at once.
If, over time, the marker moves smoothly from the landmark, reduce the Pattern Window to more accurately limit the landmark.
If the landmark changes its size during the sequence (for example, stretches on the skin), then adjust the size of the Pattern Window when you are tracking such areas.
Tracking Multiple Markers
The tracking of a group of selected markers is performed in a similar manner. First, select a group and then press the ] key or the [ key to start tracking. Markers track independently from each other. However, if tracking stops for any of the markers from the group (for one of these reasons), then tracking for other markers of this group will not be interrupted. Instead, this marker will be deselected and will no longer be tracked. After the last marker is deselected, tracking will stop.
If the whole group doesn’t track well, try changing the Pattern Window and Search Window for markers in it. (in more detail).
Hint
Use tracking of a group of the markers at the very beginning. Create multiple markers and track them in a group. Markers that were dislocated you can track individually, paying special attention to them.
Selection / Deselection Markers
- To select one marker:
Click on it or choose it in the Markers list. The selected marker should turn white.
- To select several markers:
Hold SHIFT and in the Viewport, click on the centers of the markers. They will be highlighted in white and also marked as selected in the Markers list.
Hold CTRL and in the Markers list click on markers to select them. They will be selected simultaneously in the Viewport.
Select one of the markers in the Markers list. Then, by holding SHIFT select another one. The entire range of markers between them will be selected.
Press CTRL + A to select all markers.
- To deselect markers:
If you want to remove all the selection, click in an empty place of the Viewport or empty place of the Markers list.
If you want to exclude some markers from the selected ones, then press CTRL and click on the markers in the Viewport or in the list.
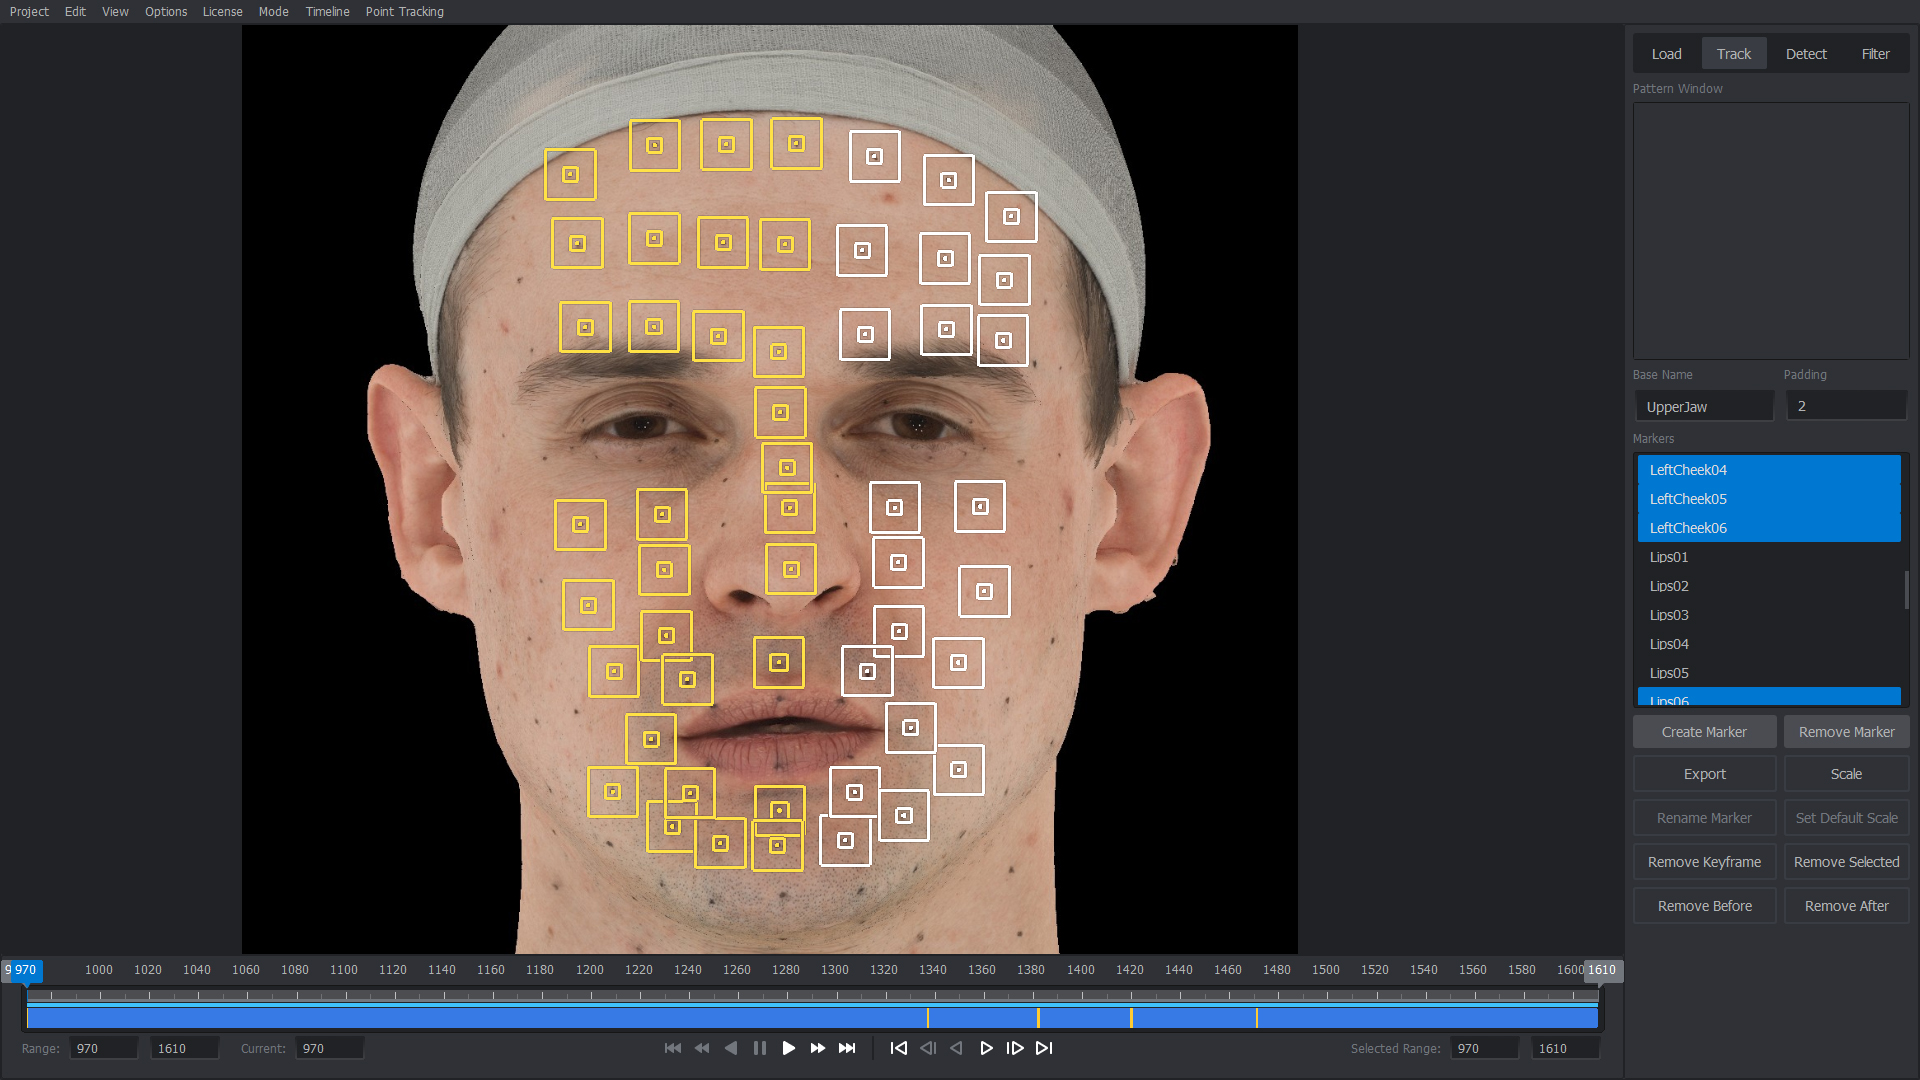
When one or more markers is selected, you can track them, re-size them, remove or export these markers . Also, if there are keyframes or tracked frames for the selected markers, they will be displayed on the Timeline. For each selected marker on the timeline, its keyframes and tracked frames will be displayed in the Active range.
Note
Keyframes will always be drawn in priority, even if you select multiple markers.
Showing / Hiding Markers
- When plenty of markes are presented in the viewport, there is an options how to show them:
By pressing A or View > Show Markers > All, all markers will be shown always. It’s a default option.
By pressing S or View > Show Markers > Selected Only, only selected markers will be shown. If none selected, then all will be shown.
By pressing B or View > Show Markers > All With Same Basenames, if any marker is selected, then all markers with same basename are also visible. If you selected several markers from with different basenames, then all affected groups will be shown.
Naming Markers
Since it may be necessary to create several markers with one name template, for example, Lips01, Lips02, Lips03.., it is convenient to use the BaseName and Padding fields.
In the BaseName field, specify the common part of the name. In this case, it is Lips.
In the Padding field, set the number of digits for the marker number. The resulting name for the marker will be generated by substituting the next number in these positions. This will happen according to a principle similar to finding the path of the frame by the mask.
When a marker is just created, it is assigned the corresponding name based on the values of these fields. If markers with the same name already exist, then the next number will be selected for the marker.
Note
Numbering markers start with 1.
Note
The next number will be assigned even if markers with previous numbers are missing. For example, with an existing marker LeftEyebrow05, the next one with the same Basename and Padding will be LeftEyebrow06, even if there is no marker LeftEyebrow01.
Tip
You can enable or disable the display of marker names in the Viewport through the checkbox Options > Preferences > Markers View > Show Markers Names.
Removing Markers
You can select any number of markers and then press DELETE to remove the corresponding markers. You can remove markers one by one by clicking on them while holding CTRL in the Viewport. Also, the marker will be removed if you remove all its tracked frames (more details).
Removing frames
- If you need to remove not the entire marker, but only some of its frames:
- Remove keyframes:
The Remove Keyframe button is to remove keyframes in the Selected Range.
- Remove tracked frames:
The Remove Selected button is to remove keyframes in the Selected Range.
The Remove Before button is to remove keyframes in all frames before Current Frame.
The Remove After button is to remove keyframes in all frames after Current Frame.
Tip
All described actions are also performed for a group of selected markers.
Warning
If you removed all keyframes and tracked framed for the marker, it will be removed. You will get a pop-up warning.
Resizing Marker Windows
You can resize the Pattern Window and Search Window of the marker by dragging them with the mouse in the Viewport. You can drag around the corner of the window or hold the SHIFT key down to grant uniform scaling.
If you want to change the sizes of several markers at once, press the Resize button. The Scale Dialog will appear. It displays the indentation, length, and width of the Pattern and Search Window of the selected markers.
To see the result, click OK. You can also save the size data as default. Then all subsequent markers will appear with the same window geometry.
Tip
You can set the size of the selected marker as default without going into the dialog. Just select the marker and click the Set Default Scale button.
You can also return the window geometry of the selected markers to the original geometry by pressing the Reset to Default button or align the windows by pressing the Align to Center button.
- Before you assign your geometry as default, here are the values for standard sizes:
Pattern Window: 40px x 40px. Centered.
Search Window: 60px x 60px. Centered.
Tip
Select the window size, focusing on the resolution of the frames of the loaded sequence.


